

| Dials & Gauges Blockset | |
Accessing an ActiveX Control Block in a Different Model Window
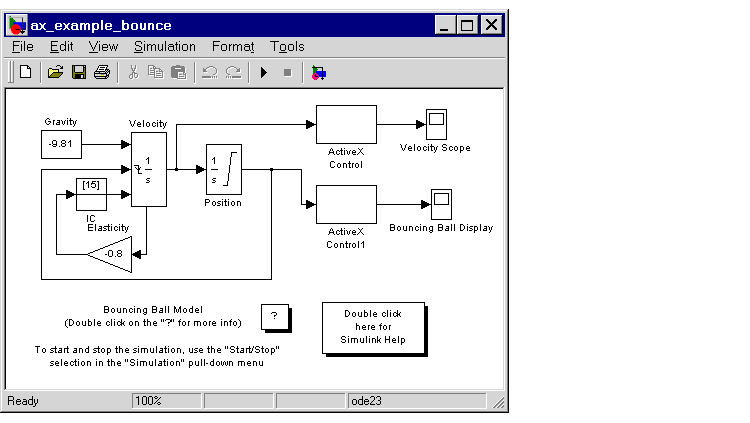
This sample model modifies the bounce demo by displaying the position and velocity signals on ActiveX Control blocks contained in another model window. Modify the model by adding two ActiveX Control blocks before the Velocity Scope and the Bouncing Ball Display Scope. The modified model looks like this.
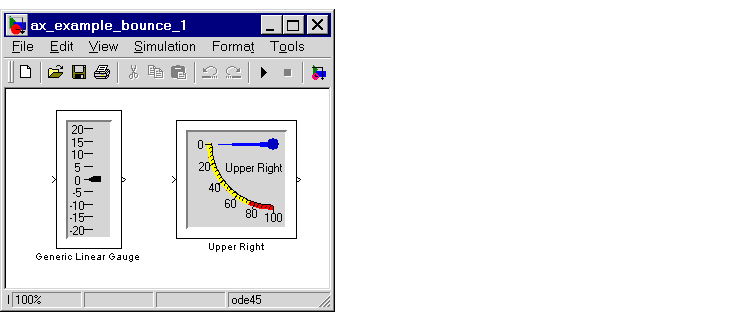
Create a new model and copy two ActiveX gauges into it.
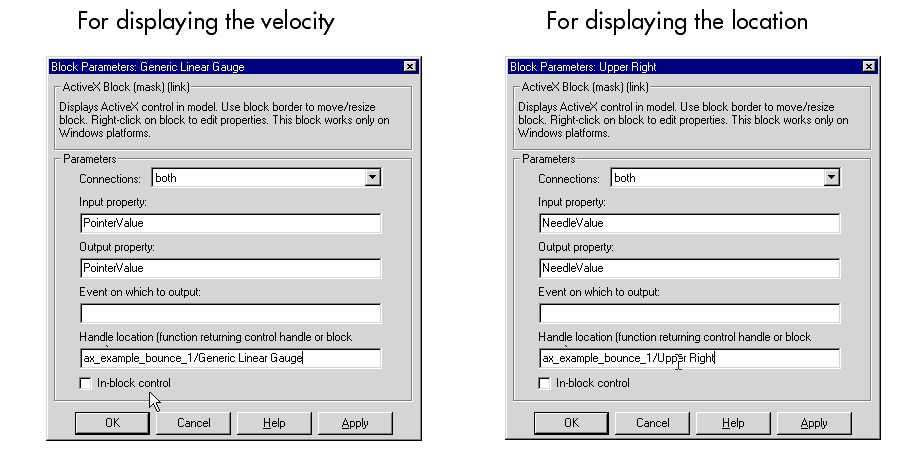
To connect the ActiveX Control blocks to the controls, open the ActiveX Control blocks and modify the Block Parameters dialog box:
NeedleValue property for the position display and PointerValue for the velocity. This property controls the current value of these ActiveX gauges. Doing this passes the value of the input signal to this property.
ax_example_bounce_1.
Accessing an ActiveX Control Block in a Figure Window
In this example, a simple model displays the simulation time on an ActiveX Control block located in a figure window. The model looks like this.

f = figure;
mwagauge.agaugectrl.1. The statement also specifies the position of the ActiveX Control block in the figure window.
h = actxcontrol('mwagauge.agaugectrl.1', [100 100 100 100], f);
See the reference documentation for actxcontrol.
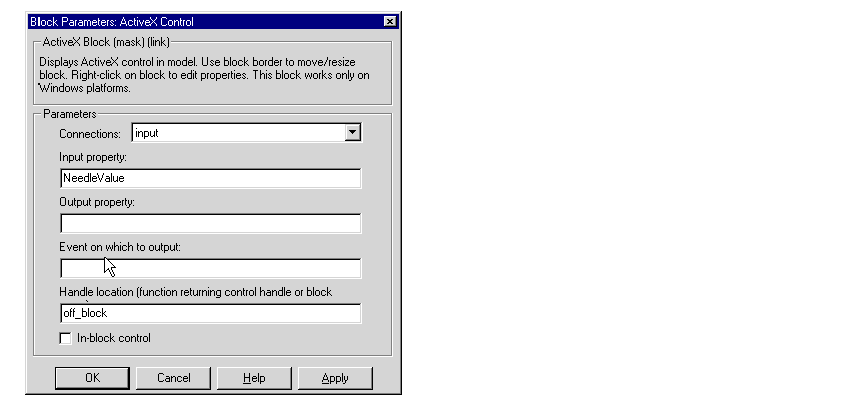
off_block that consists of these statements.
function hactx = off_block
hactx = evalin('base', 'h');
NeedleValue. When a signal is received at the ActiveX Control block's inport, this property of the ActiveX Control block referenced by the ActiveX Control block (the Generic Angular Gauge) is set with the signal value.
off_block, an M-file containing a function that returns the handle of the ActiveX Control block that is to be connected to the ActiveX Control block (the code appears below). With the fields filled in, the Block Parameters dialog box looks like this.
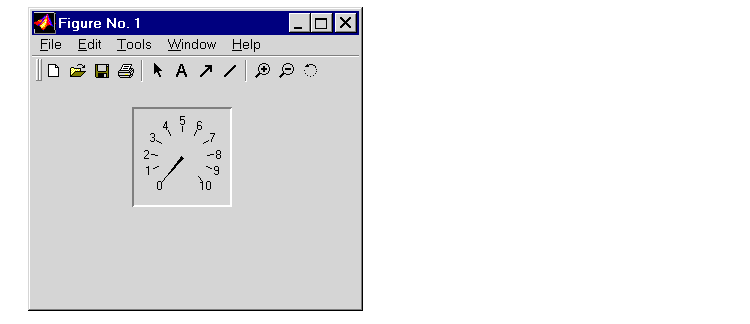
off_block M-file, which returns the handle of the ActiveX Control block in the figure window. The figure window looks like this (resized).
| | Summary of Dialog Box Fields and Check Boxes | The Strip Chart Control Block | |