This interactive demonstration introduces you to the following Simulink concepts.
If you haven't already, open the Simulink model
busdemo.mdl.
The left side of this model contains five source blocks, for example the Chirp Signal block, from the Simulink Sources library. Each block generates a scalar output signal that is appropriately labeled on the diagram. These five signals are then bundled together through the Mux block (found in the Simulink Signal & Systems library) to create a bus of signals. This bus of signals is then fed into the Bus Selector block.
The Bus Selector block pulls out the Pulse and Chirp signals from the original bundle of signals. These two signals are then displayed on a Simulink Scope with two axes. The Pulse signal will be shown on the top axes and the Chirp signal on the bottom axes.
You can run the
simulation to see the output of the Chirp and Pulse blocks on
the Scope.
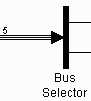
After running the simulation, look at the lines in busdemo.mdl. Notice that the signal going into the Bus Selector block is drawn with three lines, as shown below.
This line format indicates a signal bus. A signal bus represents a set of signals, analogous to a bundle of wires tied together.
If you display the signal dimensions, by checking the Signal dimensions command in the model's Format menu, you should notice that a "5" appears on the bus signal, as shown below.
This tells you that there are five signals bundled in that bus
signal, one from each Source block.
You can change the Sine Wave block to output a vector of signals, instead of a scalar. To do this, first open the Sine Wave block by double clicking on the block in the diagram. This opens the Block Parameters dialog associated with the Sine Wave block.
The first field in the Block Parameters dialog is Amplitude. You can change the value in this field to a vector, using the following commands.
The line coming out of the Sine Wave block now has a
"2" above it, indicating that it carries a vector, or
1-dimensional, signal with two elements. Notice that the input
signal to the Bus Selector block is still labeled with a width of
5. That is because, conceptually, there are still five wires
contained in this bus, or bundle. The fifth wire just happens to
contain a vector signal.
You can instruct the Simulink model to display vector and matrix signals with a different line format by checking the Wide nonscalar lines command in the model's Format menu.)
With this option checked, scalar and vector/matrix signals are drawn with different line formats, as explained below.
The example above provides you with two pieces of information.
By default, the signals in your Simulink diagram are 1-dimensional vectors. You can, however, introduce 2-dimensional matrices into your diagram. To demonstrate this, change the Sine Wave block so it outputs a matrix signals instead of the vector you previously entered.
To do this, open Sine Wave block by double clicking on the block. At the bottom of the dialog (and on the bottom of all Source block dialogs) you'll see the Interpret vector parameters as 1-D check box.
To illustrate this, make the output of the Sine Wave 2-dimensional using the following steps.
Notice that the output signal of the Sine Wave block is now labeled "[1x2]". Simulink is actually carrying a 2-D matrix signal along that line! Again, the input signal to the Bus Selector block still has a width of 5, but the fifth wire contains a matrix signal.
You can enter any 2-dimensional matrix into the Source blocks. To enter a 2x2 matrix, for example, open the Sine Wave block dialog, enter [1 2; 3 4] in the Amplitude parameter, and update the diagram, the signal coming out of the block now has the dimensions [2x2].
Note: When you enter an m-by-n matrix where neither m nor n is one, the block's output will always be a matrix regardless of the current state of the Interpret vector parameters as 1-D check box. The check box only applies to vector parameters, where either m or n is one.
The output of the Mux block still has a width of five, where the last element is the matrix signal you previously entered. To illustrate this, you can configure the Bus Selector block to output the matrix signal from the Sine Wave block. To do this, first open the Bus Selector block by double clicking on the block.
Use the following steps to change the contents of the signal list to the Pulse and Sine signals.
Now, run the simulation. The bottom axes on the Scope displays the four signals from the Sine Wave block.
Note: The labels for the signal name and signal dimension may overlap on the bottom line feeding into the Scope block. If this is the case, just hold the left mouse button down on the signal name while dragging it to another location on the line. Then, you should see that a [2x2] signal feeds into the second input.
Various blocks in the Simulink diagram highlighted when you clicked some of the links in this demonstration. This was done using the new hilite_system function. The syntax is hilite_system(sys) where sys is the name of the block you want to highlight. There are a variety of different highlighting schemes, which you can find by looking at the help text for this command. Here are a few samples that highlight the Sine Wave block.
Close the Bus block demonstration Simulink Model