| Wavelet Toolbox | |
Discussion
We note that the highest frequencies appear at the start of the original signal. The successive approximations appear less and less noisy; however, they also lose progressively more high-frequency information. In approximation A5, for example, about the first 20% of the signal is truncated.
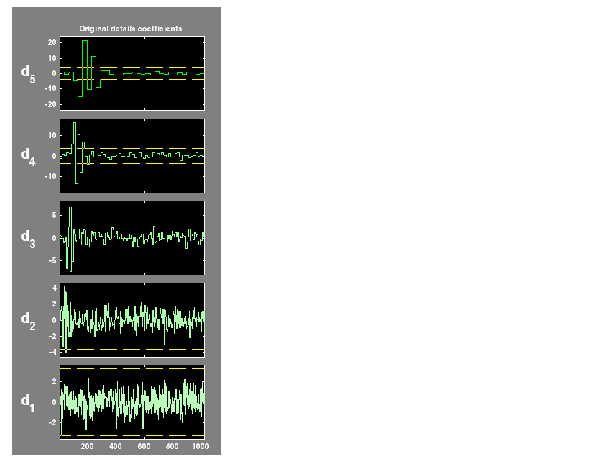
Click the De-noise button to bring up the Wavelet 1-D De-noising window. This window shows each detail along with its automatically set de-noising threshold.
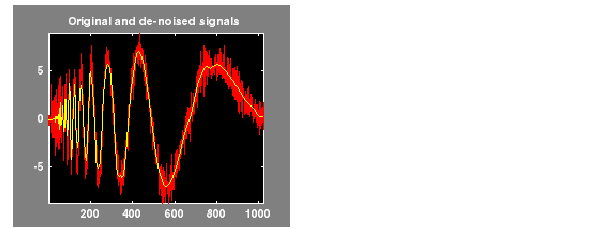
Press the De-noise button. On the screen, the original and de-noised signals appear superimposed in red and yellow, respectively.
Note that the de-noised signal is flat initially. Some of the highest-frequency signal information was lost during the de-noising process, although less was lost here than in the higher level approximations A4 and A5.
For this signal, wavelet packet analysis does a better job of removing the noise without compromising the high-frequency information. Explore on your own: try repeating this analysis using the Wavelet Packet 1-D tool. Select the menu item File Demo Analysisnoisdopp.
| | De-Noising Signals | De-noising Images | |