
| Requirements Management Interface |   |
How To Add a Requirement
If a node contains other nodes, click  next to the node to expand it. You can then select one of the nodes in the expanded hierarchical tree.
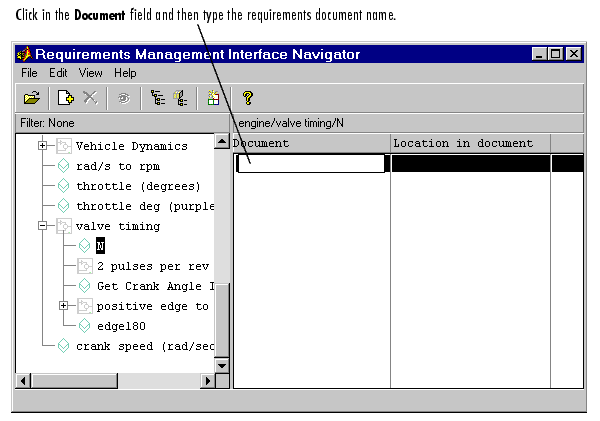
The cursor moves to the right pane, allowing you to type in the requirement information. This example shows adding a requirement for the N node of the valve timing subsystem in the engine model.

Figure 1-6: Adding a Requirement
Here are examples of full pathnames.
| Pathname |
For Document Type |
c:\Requirements\Car Requirements.doc |
Word |
d:\car_files\car_reqts.xls |
Excel |
http://www-internal.com/carreqts.html |
HTML |
file:///bserver/car/requirements.html |
HTML |
Double-click in the Location in document field, type the location, and then press Enter. An example location for any document type is valve_timing.
| Note If your Stateflow chart contains transitions that are not unique, do not associate requirements with them. |
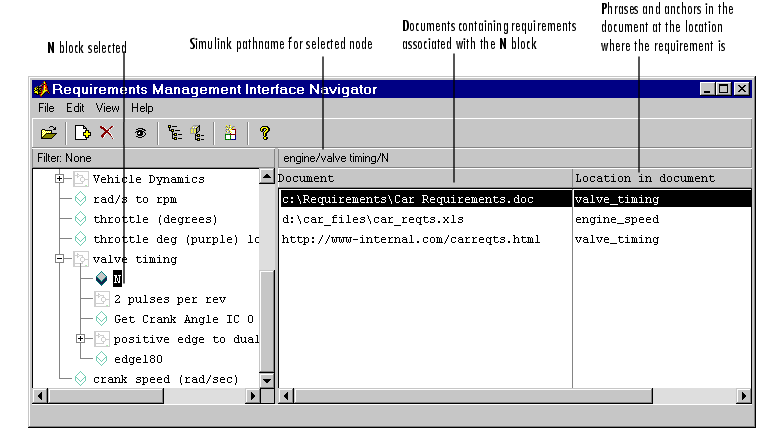
This example shows three requirements for the N node of the valve timing subsystem in the engine model.

Figure 1-7: Node with Associated Requirements
Saved Requirements
Adding a requirement automatically saves the model or M-file.
% Autogenerated requirements (do not modify) = { 'OTHERS'
'c:\Requirements\Car Requirements.doc' '' 'true' }
 | Adding Requirements | Viewing Requirements in the Navigator |  |