| Database Toolbox | |
Setting Up a Local Data Source for ODBC Drivers
Follow this procedure to set up a local data source for a PC. This procedure uses as an example, the Microsoft ODBC driver Version 4.00.42 and the U.S. English version of Microsoft Access 97 for Windows NT. If you have a different configuration, you may have to modify the instructions.
If you have Microsoft Access installed and want to use many of the examples in this document as written, set up these two data sources:
dbtoolboxdemo data source - Uses the tutorial database provided with the Database Toolbox in $matlabroot\toolbox\database\dbdemosSampleDB data source - Uses the Microsoft Access sample database called NorthwindThe ODBC Setup dialog box appears for the driver you selected. Note that the dialog box for your driver might be different from the following.
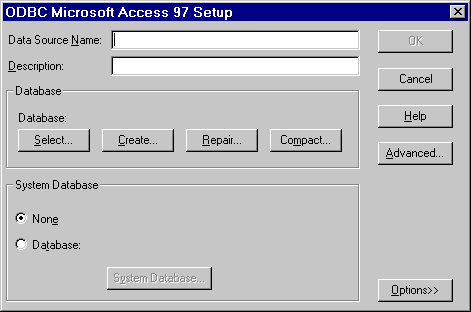
For the first example data source, type dbtoolboxdemo as the data source name. For the other example data source, type SampleDB as the data source name.
Note that for some databases, the ODBC Setup dialog box requires you to provide additional information.
For the dbtoolboxdemo data source, select tutorial.mdb in $matlabroot\toolbox\database\dbdemos.
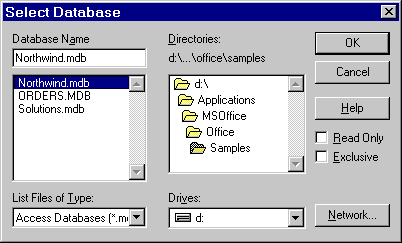
For the SampleDB data source, select Northwind.mdb in the msoffice\...\Samples directory.
| | Setting Up a Data Source | Setting Up a Remote Data Source for ODBC Drivers | |